
I know, when Christmas is getting close, what all of you search across the web is how to make rock candy at home, yes, we all love those colorful, appealing buds of sugar rush!
And when you can get the expertise to create these happiness-filled sweet buds at home, any celebration becomes manifold cheerful and brighter!
How to Make Homemade Rock Candy with Natural Methods
Making rock candy at home is quite straightforward. It has a unique aroma and flavor; it’s such a fun-filled recipe even kids will love to indulge in making vibrant candies!
You can put your hand into something creative and artistic as the recipe for homemade rock candy also feels soothing to your eyes; you can see the beautiful rock candy sugar crystals expand!
Also, the shades and flavors that you can create for candies are endless and appealing.
I have discovered a simple recipe for you to try if you have been searching for how to make homemade rock candy in a more natural way!
Yes, but the procedure needs some patience. The essential ingredients in the recipe are sugar and water, and additional material for color will be required. It involves just simple steps of creating syrup of sugar which can be molded on sticks and strings!
Even though initially you will see the formation of rock candy in the beginning hours, the perfect rock candy is formed only after seven days!
The size of the jars you are utilizing will affect the real quantity of sugar syrup that will be needed for recipes and how many candies you want.
How to Make Homemade Rock Candy
Ingredients
- Water – 2 cups
- Granulated sugar – 6 cups
- Food coloring – 2 drops
- Flavoring extract or oil – 1/2 to 1 teaspoon
Instructions
- Prepare the list of ingredients.
- Stream some hot water and clean the glass jars.
- A wooden skewer that hangs about 1-inch from the bottom of the jar will be ideal for each jar use. Get some clothespins that have a tight grip and put them at the top of the pot to keep the incorrect skewer position.
- Get all the ingredients.
- Get some water and wet every wooden skewer with it and spin it in the granulated sugar. The sugar crystals will have something to grab once they begin to form by going through this essential layer step. Start preparing the sugar syrup and keep these aside.
- Take a medium-sized pan and stream water in it; let it get boiled. Start pouring some sugar, one cup of sugar at a single time, and stir the mixture after each addition. Sugar might take a longer time to get dissolved entirely when you keep on adding each additional cup. Keep stirring it and bring it to a boil, let the sugar get wholly merged in the syrup and completely dissolved. Take out the pan from heat.
- You can stream your favorite flavors and colors at this point if you want. If you are adding an extract, simply merge one teaspoon of extract, and mix ½ teaspoon of flavoring oil. Stream 2 to 3 drops of food coloring and stir it to form an even colorful mixture.
- Keep the sugar syrup for rest for about 20 to 30 minutes and let it cool down.
- Stream hot water in a prepared jar and rinse them and then pour the sugar syrup into them.
- Lower down the single sugar stick in every prepared jar unless it swings away about 1 inch from the bottom of the pot.
- Keep your jar in a cool place and prevent it from strong lights in a calm place. Get plastic wrap and cover up the top gently.
- In 2 to 4 hours, you will see rock candy sugar crystals begin to form. If 24 hours pass and you don’t see any change, boil the sugar syrup once again and try dissolving another cup of sugar in it. Stream it back in the jar and put the string again.
- Let the rock candy grow to the size you want. Stop it from becoming too large as it might begin to grow outside the jar extending it.
- Keep in mind that the top layer of the crystal would be formed. Once you get the ideal desired size of candy, break the uppermost layer of glass by using a fork before taking out the candy.
- Shift your rock candy to an empty jar (Arrange some clothespins on the pot to keep it in balance) and allow it to get dry for 1 to 2 hours, wrap it using plastic wrap to preserve for later.
- Serve and enjoy.
Also Read,
- How to make edibles for that perfect weed kick
- 13 Keto Onion Rings recipes for a great party appetizer!!
- 9 Keto margarita recipes for party | Simple Keto margarita chicken!
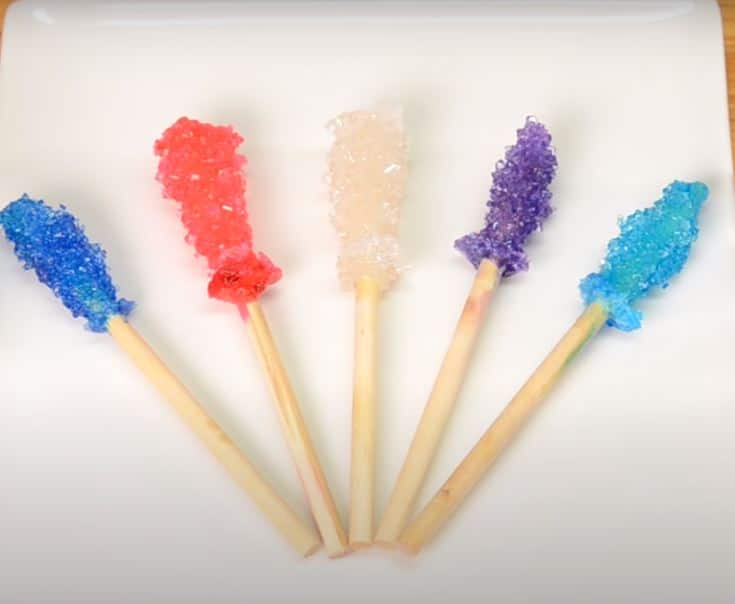
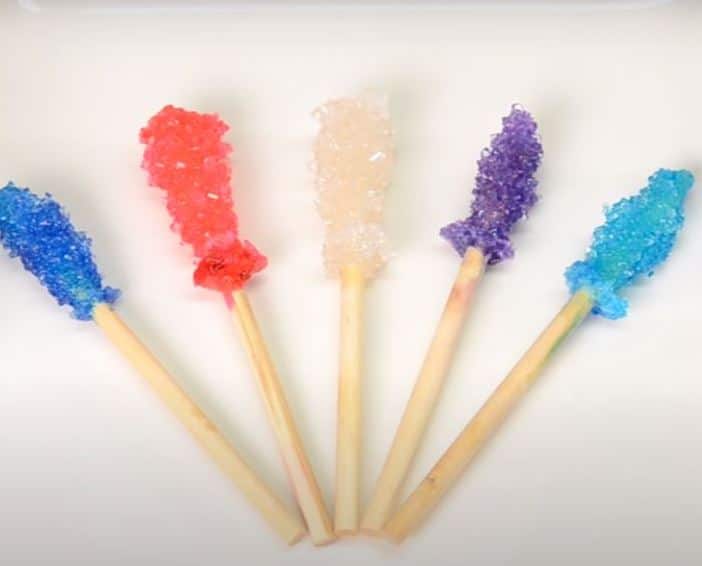
How to Make Rock Candy on a Stick
Creating sugar candies on a stick is as simple as making homemade rock candy sugar crystals, and your family members will love to eat them all while relaxing at the weekend.
Kids can learn how distinct materials change when heated, or merged with other blends, through this opportunity. Kids find it very interesting to see sugar crystals transforming and their growth.
Ingredients
- Water – 2 cups
- Granulated white sugar – 4 cups
- Food coloring
- Flavoring
Simple Steps to Make Homemade Rock Candy on a Stick
- Use some water to wet a skewer or string and spin it in some granulated sugar. The granulated sugar will transform into seed crystals, which allows dissolved sugar to clasp upon something and a step where they start crystallizing.
- The seed crystals make the rock candy grow more naturally. It will even increase the speed of the process by delivering crystallizing sugar to the right spot for bonding.
- Let the skewers get dried wholly before stepping up for the next procedure. Sugar might fall off in the glass if it is not properly bonded to the wood and the crystallization will form up on sugar at the base of the glass.
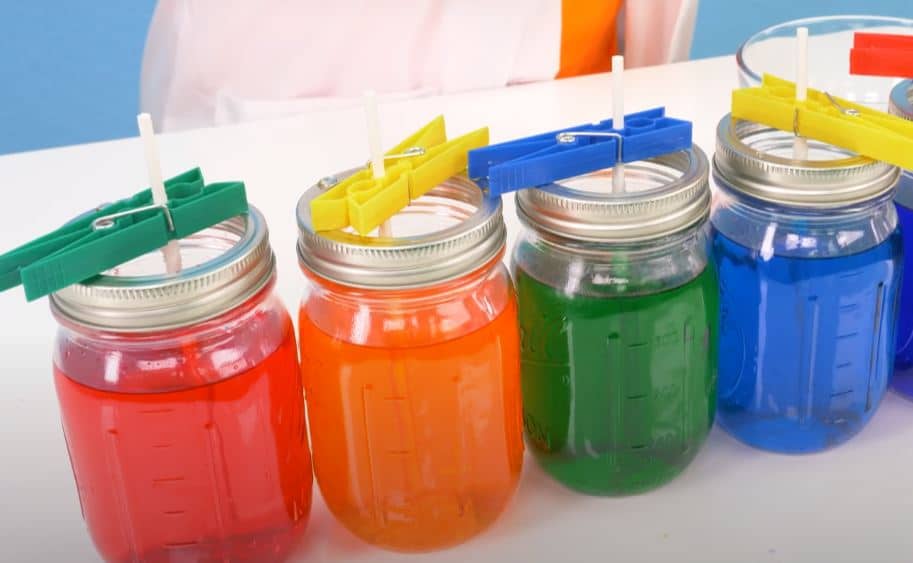
- Keep the skewer at the center of the glass, at a distance from the sides of the glass and the tip should float at a distance from the base of the glass. If the string or skewer gets too close to the bottom of the glass, it might hinder the growth of crystals, and many times your string gets stuck at the bottom.
- Putting the skewer floating just above 1 inch (2.5 cm) from the base of the glass is the best rule you can follow.
- Use a clothespin to pick up the dry end of the string and keep the clothespin at the top of the glass. Simply pinch the skewer in the middle of the clothespin. If the glass is wider in the mouth, you can use a large clothespin.
- Secure your skewer by using the clothespin, and it should be in the middle of the glass.
- Take a paper towel and cover up the glass with it. Simply create a little hole through which the skewer can poke inside the towel.
- Keep the glass or jar in the safest place, undisturbed. You might be unaware but external things like Music, and television, create the vibrations that disrupt your crystals and shake off the stick. You can store the glass in a cold temperature room in a spot that is unaffected by noise for optimum growth.
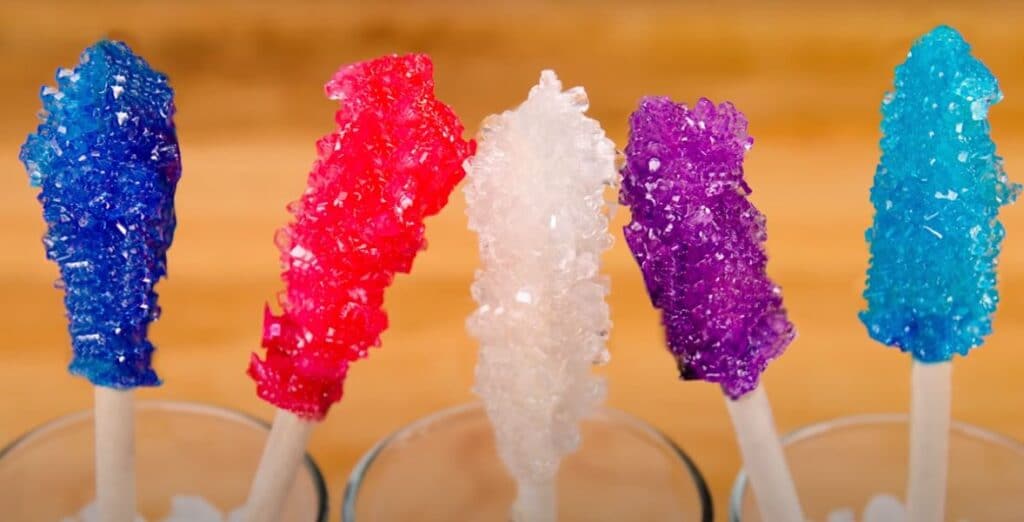
- Keep the jar for seven days to 2 weeks to let your rock candy get entirely ready. Do not touch or tap the jar; it will create a disturbance. When you get the perfect-sized rock candy crystals, gently take out the skewer and keep it on wax paper.
- Use a butter knife to break through crystals simply, if you find the crust on the water surface.
- If your candy gets stuck to the jar, stream some hot water at the jar’s bottom. It will help to loosen up the sugar; thus, you can pull out your rock candy easily without any problem.
How to Make Rock Candy Geode Cake
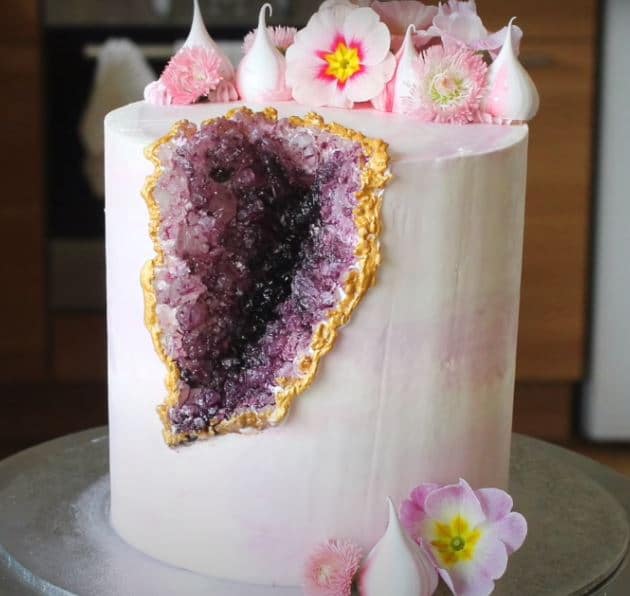
Geode cakes are very famous for their utmost appeal at weddings; these cakes’ designs are so charming and beautiful, that a single gaze is enough is fill up the eyes with pleasure.
This cake has a unique structure of crystals along with vibrant rock candies extending out of cuttings! It looks quite time-consuming and delicate, but quite easy to make!
This is a typical scenario that might have happened to many when they were searching for making rock candy cakes for weddings, and enchanting images of delicious geode cake appeared in front of them, leaving them in great ‘aww’!
Geode cakes naturally mimic rock formation, the usage of numerous colorful rock candy crystals increases the look of geodes quite a lot.
Ingredients
- White cake – 1
- Fondant (2 ¼ kg) – 5lb
- Buttercream frosting – 4 cups
- White rum
- Black food coloring – 1 tablespoon
- Piping gel
- Rock candy – You can choose the color of your choice.
Instructions
- By using the clean gentle fondant, wrap up the cake.
- Make a geode shape by cutting the sides of the cake.
- Roll out the buttercream frosting in the all inner part of the cut.
- Pour some alcohol into the food colorings, it should take a little hue of grey shade
- Around the edge of the cut, paint a thin dark line
- Take a piping gel and apply it to the middle portion of the cut.
- Stick the rock candies in piping gel, and you can begin with dark shades.
- Keep creating out-layer rows of piping gel and continue to stick rock candy, press light color candies as you come toward the edge of the cut, it will make it look beautiful!
- Enjoy!
How to Make Rock Candy with KoolAid
Making Kool-Aid Rock Candy is fun as well as it is treated as a science experiment as kids love indulging in rock candy procedures, kids just adore it!
It usually takes about a week for crystals to grow, which makes this whole process even more interesting for kids as they have a vast time to see those crystals getting transformed!
Many times you have noticed the unique rock candy in the science fair as a science experiment! As it’s enjoyable for kiddos! The shades and flavors that you can involve in it are infinite, but the usage of kool-aid also shapes it into a more elegant taste!
So, in this recipe, we attempted to put Kool-aid for flavor and coloring for the rock candy. And it turned out to be the most fantastic rock candy recipe ever, so let’s explore!
Ingredients
- Kool-Aid – 3 pkg
- Sugar – 12-18 cups
- Water – 6 cups
- Your choice of food coloring
- Pot – large sized
- Funnel
- Bottles or Glasses – 8 to 12
- Clothespins – 8-12
- Wooden sucker sticks – 8-12
Instructions
- After you have arranged all of the ingredients, make the end of the sucker stick wet and coat it by rotating them in sugar.
- It will give the dissolved sugar something to stick to.
- Make use of clothespins by placing them on the sticks where you think would be suitable. It will help to hold them in the perfect place.
- Before you go for another step, completely clean your bottle, and make them free of any residue.
- Take the pot and pour the water into it above the stove. Pour 1 cup of sugar. Stir it regularly.
- Pour sugar until you get a 2:1-3:1 ratio of sugar & water.
- Make sure you have enough sugar.
- You have to pour sugar until the water is filled. It should develop a cloudy white surface on it.
- You can merge the Kool-Aid after you take out the mixture from the stove. Three packages of Kool-Aid will be enough.
- Numerous food colorings are there to make the recipe look very pretty.
- The Kool-Aid also delivers a unique flavor AND color to the candy with a pinkish hue. But the color does not stay for too long.
- Pour the mixture into bottles in an even manner by using a funnel.
- Gently keep the sugar-coated rock candy sticks back in the bottles.
- Keep it on the windowsill where it has lots of light. If you let it get cold the process, it will take much longer.
- Keep it for seven days, and watch it grow.
How to Make Homamde Rock Candy with Cinnamon
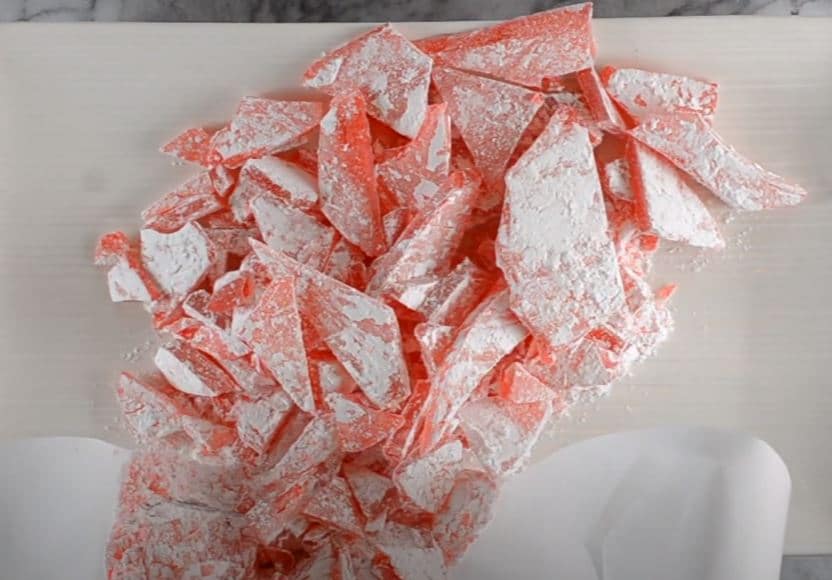
Cinnamon rock candies are just another fantastic variant of rock candy recipes; it has all different yet mouth-watering taste, and you will love the robust flavor of it.
Ingredients
- Cinnamon oil – 1 teaspoon
- Light corn syrup – 1-1/4 cups
- Red liquid food coloring – 1 teaspoon
- Sugar – 3-3/4 cups
- Confectioners’ sugar – 1/3 cup
- Water – 1 cup
Instructions
- Take a pan of 15x10x1-in. And arrange a foil on it; roll some butter on the foil and keep it aside.
- Take a large-sized heavy saucepan, and combine sugar, corn syrup, water, and sugar along with food coloring in it. Use a medium heat flame to bring to a boil and stir it regularly. Cover it and dissolve sugar crystals completely by cooking for 3 minutes.
- Uncover it and use medium-high heat flame for cooking it, don’t stir it, keep cooking for at least 25 minutes until a candy thermometer reads 300°. Take it out from the heat flame; merge some cinnamon oil quickly stream on the prepared pan. Keep it cool down completely, at least for 45 minutes.
- Make the pieces of candy by using an edge of the metal mallet. Sprinkle confectioners’ sugar on both sides of the candy. Use an airtight container to store it.
How To Rock Candy For Jelly Shooters
We all love luscious tasty jelly, its translucent texture and soothing sweet taste are a must to get your perfect sugar boost after brunch. The colorful translucent shades of jelly shooter get beautifully stuck on your appealing rock candies; the whole recipe looks very striking to the eyes!
Ingredients
- Strawberry gelatin dessert – 1 box
- Berry blue gelatin dessert – 1 box
- Water – 3 cups
- Plain gelatin – 6 envelopes
- Sweetened condensed milk – ½ cup
- Ice cold fruit-flavored vodka or rum – 2 ½ cups
Instructions
- Take a heat-safe bowl and pour each of the gelatin dessert mixes into it, and keep it aside.
- Get a medium saucepan and stream the water in it. Dust the six envelopes of plain gelatin in it. Keep it for rest and let the water soak it for 2 minutes.
- Keep it on medium-low heat, and stir it consistently; the gelatin should be fully dissolved in water.
- Take a bowl containing strawberry gelatin blend and stream one cup of the plain gelatin mixture in it. Stir it for two minutes. Repeat the same process for blue gelatin. Pour one cup of the liquor into every bowl, and stir the mixture well.
- Take a saucepan that contains the rest of the clear gelatin and stream the sweetened condensed milk into it. Stream liquor of ½ cup in it and combine it well by stirring.
- Sprinkle the cooking spray on 4 1 lb loaf pans. You can get some clean paper towels to wipe it out.
- Into one of the prepared loaf pans, pour 3/4 cup of the red gelatin mixture. Repeat the same process and pour 3/4 cup of the blue gelatin mixture. Split white gelatin between left both pans. Keep all the pans in the refrigerator to make the gelatin set perfectly.
- Keep it aside after covering the liquid gelatin.
- Cut the gelatin to make small cubes when the gelatin pans are completely set. (You can also make cubes of gelatin in the pan itself).
- Merge the gelatin cubes and separate them as you want between two of the loaf pans.
- Take the liquid gelatin and pour the red liquid gelatin into one pan, and blue liquid gelatin in the other, to fill up ¾ of the gelatin cubes, some liquid gelatin will be left over. Keep the pans in the refrigerator and keep them for several hours or the whole night to set correctly.
- Take out pans from the fridge. Slash the edges of the pan, and upturn the gelatin slabs on the non-sticky texture to cut it.
- Make the 3/4 to 1-inch strips of gelatin, and twist the knife to give an uneven edgy finish. If you make skinny strips, they can break when skewered.
- Use a lollipop stick to skewer each strip – keep the gelatin softly at the edges, and keep the stick extending to the top. Keep it on a non-stick cookie sheet and cool it until you serve.
How To Make Homemade Rock Candy
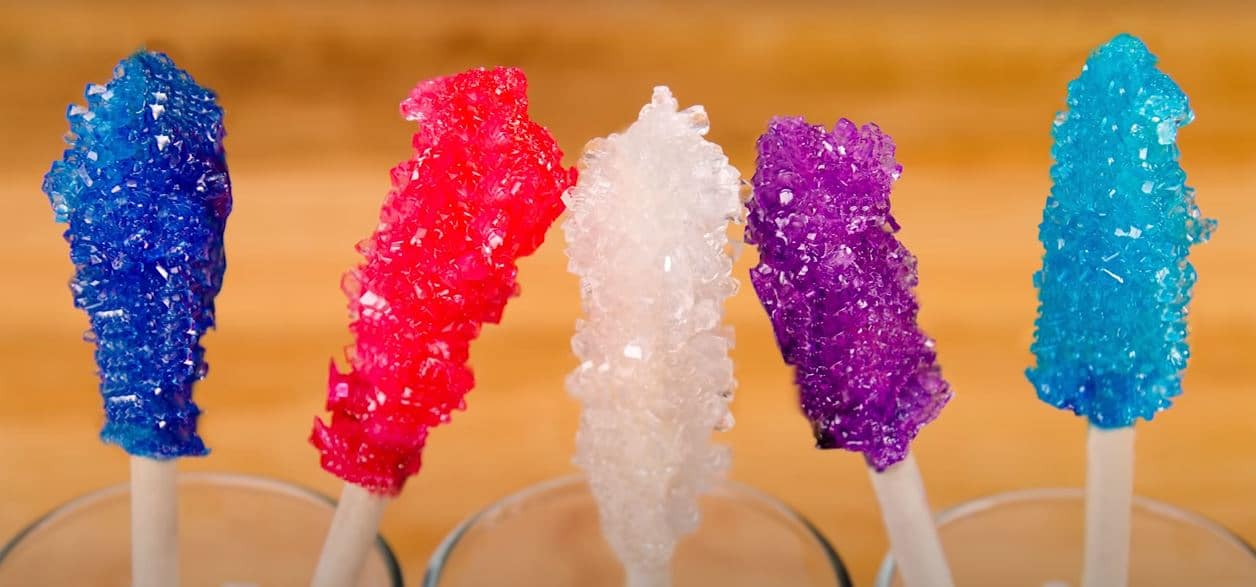
HOW TO MAKE ROCK CANDY AT HOME
Ingredients
- 3 cups • White granulated sugar
- • Food coloring (if you want to add)
- 1 cup • Water
EQUIPMENT
- • Full glasses or mason jars (400 to 800ml)
- • Clothespins
- • Pot
- • Wooden spoon or spatula
- • Lollipop sticks or bamboo skewers
Instructions
- Dip the sticks in water and then rotate them up in the sugar. You can use a plate to keep the sugar entirely. Keep the sticks for rest and let them get dry.
- Set a large pot on medium heat on the stovetop. Stream some water and simmer it. Then pour 1 cup of sugar at a single time, stir it and dissolve the sugar completely. Let it come to a boil. You can add the color and flavor of your choice right when it is cooked.
- Take the pot from the heat, let it rest for 20 minutes, and allow the sugar solution to cool down completely.
- Run the tap water for 20 minutes until it gets really hot. Water should run over the glass to heat it until it gets hot. Use a full glass or mason jar if you want to have larger-sized candies, but you might get very few of them. You will only get a single large one with this quantity of liquid.
- You will get more candies when you use smaller mason jars for smaller candies.
- Take a container and pour the hot sugar into it. You don’t have to heat up a metal thermos. Pour the colors and flavors of your choice at this time.
- Use the clothespin to arrange the sugar skewer and arrange it in the solution. To make the clothespin sit correctly on it, you should use a metal ring on top of the jar. Try keeping the stick in the exact center of the glass, and it should float just at least 1.5 inches from the bottom of the jar. The crystals will be filled up at the bottom if it gets too near the bottom.
- Keep it for 3 to 5 days and allow the crystals to form. Break any thin layer of sugar gently by using a fork set up on the solution's surface. Next, pull out your rock candy and shift it into a different container and keep it for 4 hours for drying. Afterward, your yummy candy will be ready!